
Contact Us

Phone
08 8294 8664

Email
sale@awdmedical.com

Address

How to Choose the Right Implant Wrench for Your Needs?

Choosing the right Implant Wrench is a small decision with real consequences for fit, handling, and workflow. A wrench may look simple on a tray, yet its connection, drive size, and torque range must match the implant system and the procedure. The wrong fit can cause slipping or damage delicate components. It can also slow the clinician at a critical moment. Details matter.

This guide explains what to check before selecting one: system compatibility, material, head design, access, and whether a manual or torque-controlled model suits the task. A clear product label helps, but it is not enough on its own. Verify the wrench against the implant manufacturer’s instructions and confirm that its connection engages securely without rocking. Feel the fit. If it seems loose, stop and reassess.

Experience at the chair or in a laboratory can reveal practical differences that specifications do not capture, such as visibility around a narrow posterior site or ease of cleaning between uses. Still, impressions vary, and familiarity should not replace documented guidance. I have to admit, tool choice is sometimes treated as an afterthought. That is worth questioning. A dependable wrench should be selected for the specific system, maintained according to its instructions, and inspected for wear before use. When uncertainty remains, consult the manufacturer or a qualified dental professional rather than forcing a questionable connection.
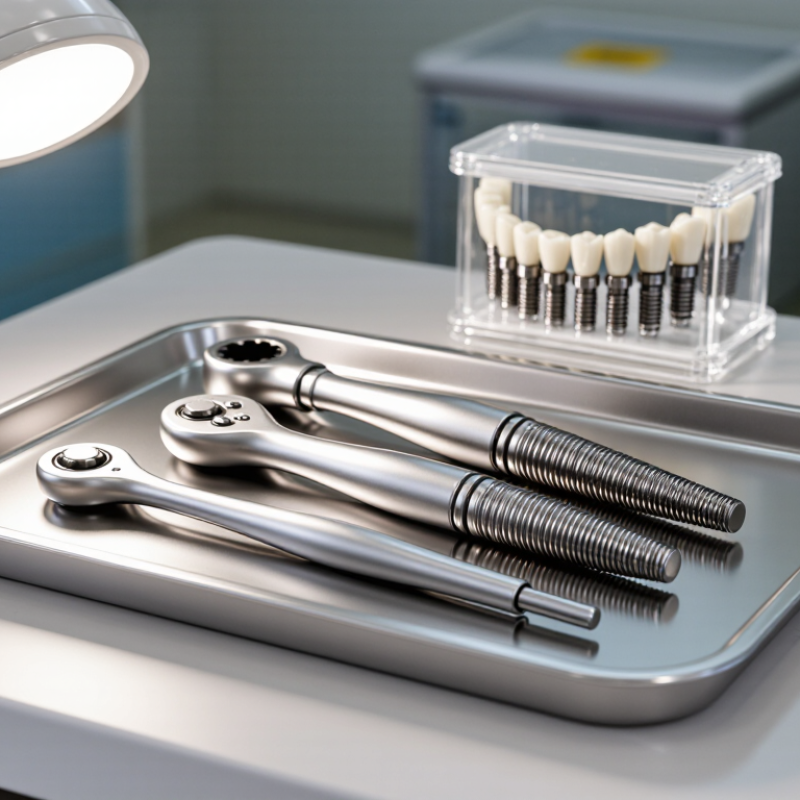
How to Choose the Right Implant Wrench for Your Needs?

Understanding the Purpose and Types of Implant Wrenches

An implant wrench transfers controlled force to a prosthetic screw. Its purpose is simple, but its role is critical. The WHO Global Oral Health Status Report (2022) estimates that oral diseases affect nearly 3.5 billion people worldwide. As implant treatment expands, accurate maintenance becomes increasingly important.

Common types include manual hex drivers, torque-controlled ratchets, and contra-angle adapters. Manual drivers suit seating and removal tasks. Torque ratchets apply a measured value, often expressed in Ncm. Contra-angle adapters help clinicians work efficiently in posterior areas. Choose the wrench by matching the screw interface, driver size, shaft length, and required torque range. Check head clearance too. A long wrench may touch adjacent teeth.

Precision matters. Systematic reviews in Clinical Oral Implants Research report prosthetic screw loosening and related technical problems across a broad range, often around 5% to 10%, depending on the restoration and follow-up period. A mismatched or poorly calibrated wrench may increase that risk. ISO 6789 guidance supports regular torque-tool verification, although dental protocols may require additional manufacturer instructions. Never assume every wrench fits every implant connection. That assumption is flawed.

In practice, I would inspect the driver tip under bright light. Rounded edges are warning signs. I would also test the ratchet before treatment, not during it. Calibration records can be easy to overlook. They should not be. The best choice is not always the most expensive wrench. It is the tool with a verified torque range, stable handling, and a precise connection for the intended procedure.

Identifying Key Compatibility Requirements

How to Choose the Right Implant Wrench for Your Needs?

Identifying Key Compatibility Requirements

Compatibility starts with the implant system, not the wrench handle. Check the connection shape, driver size, and required depth against the manufacturer’s instructions for the specific implant component. A hex driver may look close to another, but even slight differences can cause poor seating or damage. Small details matter.

Confirm whether the wrench is intended for placement, prosthetic tightening, or another clinical step. These tools are not automatically interchangeable. Review the specified torque range and connection type, then compare them with the wrench’s documentation. If a marking is worn or unclear, pause and verify it rather than guessing.

Fit should be checked before clinical use, under appropriate procedures. The driver should engage fully, without rocking or slipping when seated. Also consider access: a long shaft may reach a posterior site, but limited clearance can make positioning awkward. This is where real handling experience matters. Compatibility lists can be incomplete, and assumptions sometimes creep in. When details conflict, consult the component documentation or a qualified dental professional before proceeding.

How to Choose the Right Implant Wrench for Your Needs? – Identifying Key Compatibility Requirements
Compatibility requirement What to check Why it matters Practical selection guidance
Implant system and component interface Confirm the exact implant connection and the screw or component the wrench will engage. Interfaces can differ in geometry and dimensions, even when components appear similar. Match the wrench to the component’s documented system and connection. Do not assume that a wrench from another system will fit.
Driver-tip shape and size Check the tip profile, dimensions, and engagement depth specified for the screw head. A mismatched tip may not seat fully and can increase the risk of slipping or damaging the screw recess. Use the driver specification provided for the component. Inspect the tip for wear or deformation before use.
Manual or torque-controlled operation Determine whether the procedure calls for a manual wrench, a torque wrench, or a compatible torque-limiting driver. Different stages of implant treatment may require different instruments and levels of torque control. Follow the component manufacturer’s instructions for use (IFU); do not substitute a manual wrench where controlled torque is specified.
Torque specification and calibration Check the torque value and units stated in the relevant IFU, along with the tool’s approved range and calibration status. Torque requirements vary by component and clinical application. An uncalibrated or unsuitable tool may not deliver the intended setting. Use only the value specified for the exact component. Do not rely on a general torque value or an assumed setting.
Connection to the handle or driver Verify the wrench’s coupling type and whether it connects directly to a handle, ratchet, or powered driver. Incompatible couplings can prevent secure attachment or reliable operation. Check the instrument documentation for the approved connection and compatible accessories before ordering or use.
Working length and access Consider the required reach, available clearance, and visibility at the treatment site. A tool that is too long, short, or bulky may be difficult to position and control in limited access. Select a length and configuration designed for the intended clinical access. Confirm that the tip can be aligned with the screw head.
Reprocessing and sterilization Review the instrument’s cleaning, disinfection, sterilization, and reuse instructions. Reusable instruments require validated reprocessing; not every material or design supports the same process. Follow the wrench’s IFU and applicable facility protocols. Do not assume a tool is autoclavable or reusable without confirmation.
Condition and service life Inspect for a worn driver tip, corrosion, cracks, loose connections, or impaired torque function. Damage or wear can affect engagement, control, and the reliability of torque delivery. Remove damaged instruments from service and follow the manufacturer’s inspection, maintenance, and replacement guidance.
Documentation and traceability Confirm the instrument’s intended use, compatible components, care instructions, and any applicable identification details. Documentation helps prevent selection errors and supports correct handling and maintenance. Keep the instrument instructions available and verify compatibility against current component documentation before clinical use.

Comparing Torque Control and Handling Features

How to Choose the Right Implant Wrench for Your Needs?
Comparing Torque Control and Handling Features

Torque control matters when an implant connection requires a specified tightening value. A wrench with a clear scale or audible click can help reduce guesswork. Check its torque range against the procedure requirements and confirm whether the setting can be adjusted and verified. Small markings can be hard to read under bright operatory lights, so visibility is practical, not cosmetic. Follow the implant system’s instructions; a familiar feel is not a substitute for the specified torque.

Handling features affect control in tight spaces. Compare the handle length, grip texture, head profile, and access angle using the setup you actually work with. A narrow head may reach posterior sites more easily, while a textured grip can help when gloves are damp. Keep it steady. A comfortable grip can still conceal uneven pressure, and tactile feedback varies between users. That part is easy to overlook.

Consider cleaning and maintenance, too. Confirm that the wrench can be processed using your clinic’s validated sterilization cycle, and inspect moving parts for wear. Calibration intervals should follow the device instructions and local maintenance procedures. If a wrench feels inconsistent, do not rely on memory or hand strength to compensate. Compare its operation with a suitable verification method, and replace or service it when indicated.

How to Choose the Right Implant Wrench for Your Needs?

Comparing torque control and handling features

Qualitative comparison of common wrench designs; scores summarize typical features, not measured performance. Actual torque ranges and handling vary by model. Follow the implant system manufacturer's instructions and use the specified torque for each component.

Matching Wrench Design to Your Clinical Needs

Matching Wrench Design to Your Clinical Needs

Choosing an implant wrench starts with the connection, not the handle. Confirm that the wrench matches the implant system’s interface and the procedure’s required torque range. A mismatch can damage components or produce unreliable tightening. Check the applicable instructions for use before selecting a tool. Small details matter.

Access also shapes the choice. In a posterior site, limited clearance may favor a compact head or angled design. A longer handle can improve reach, but may feel awkward in a narrow working area. Manual wrenches offer direct feedback; torque-limiting models help control applied force when a specified value is required. Fit, visibility, and handling can vary between clinicians, so a familiar tool is not automatically the right one. I’ve found that a wrench that looks suitable on the tray may feel different once access is restricted.

Tips: Verify the interface and torque specification before use. Check that the scale is readable, the mechanism moves smoothly, and the tool can be processed according to its instructions. Keep compatible components together, and never force a wrench that does not seat cleanly. If the fit feels uncertain, pause and recheck the documentation.

Checking Quality, Maintenance, and Safety Standards

Choosing an implant wrench is not only about finding the right fit. Check that its size and connection match the instrument and implant system specified in the procedure. A mismatched wrench can slip, damage a connection, or make torque readings unreliable. Confirm any torque limits against the relevant instructions for use; don’t rely on feel alone.

Inspect the wrench before each use. Look for worn edges, cracks, corrosion, loose parts, and markings that have become hard to read. A small defect can be easy to miss under bright operatory lights. Follow the manufacturer’s cleaning, sterilization, and calibration guidance, and keep a record of service when required. If the tool has been dropped or behaves inconsistently, set it aside for assessment rather than guessing.

Tips: Store the wrench dry and protected from impact. Check calibration at the recommended interval, and verify compatibility before treatment. These checks take time, and busy teams may occasionally overlook one. That is a reason to use a simple inspection routine, not a reason to skip it.